

ちょっとQtを触る機会があったので、Qtでアプリケーション開発についてまとめます。
少しだけ触ったぐらいで終わるのは、勿体なので理解を深めるためにも、しばらくQtでアプリケーション開発の記事をまとめていこうと思います。
まず最初はインストールとアプリ作成の触りです。
そもそもQtって何?
Qtとは、クロスプラットフォームアプリケーションフレームワークである。The Qt CompanyとQt Projectによって開発されている。
Wikipedia
Qtとはクロスプラットフォームアプリケーションフレームワークです。
GUIツールキットとして広く知られており、コンソールツールやサーバーのような非GUIツールまで広く使われています。
さらに、応用分野は自動車や医療、その他産業機器、またPCやスマホ向けアプリケーションでも使用されています。
少し前のGoogleMapやSNSツールのLINEなどに使用されていたそうです。
以下の記事は、Qtが使用されているモノを一覧にしてくれているので、気になるかたは是非ご覧ください。

開発環境
インストールするQtのバージョンとQtCreatのバージョンは以下の通りです。
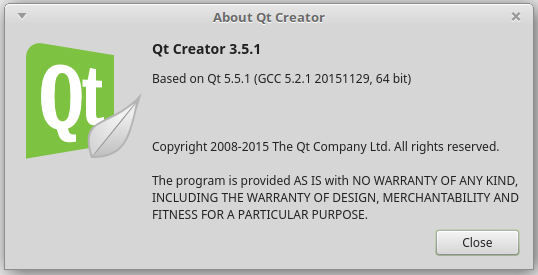
QtVersion
バージョン確認コマンド:qmake -v
mint@mintmac-VirtualBox ~/testapp $ qmake -v
QMake version 3.0
Using Qt version 5.5.1 in /usr/lib/x86_64-linux-gnu今回は、LinuxでQtのインストールとアプリケーション作成の手順をまとめました。
今回Qtをインストールしたマシン情報は以下の通りです。
mint@mintmac-VirtualBox ~/testapp $ uname -a
Linux mintmac-VirtualBox 4.4.0-53-generic #74-Ubuntu SMP Fri Dec 2 15:59:10 UTC 2016 x86_64 x86_64 x86_64 GNU/Linux
必要なパッケージをインストール
ソフトウェア・パッケージのアップデート
まずシステムのアップデートをしましょう。
mint@mintmac-VirtualBox ~/testapp $ sudo apt  upgrade
mint@mintmac-VirtualBox ~/testapp $ sudo apt  update
もし、上記の手順を省いてQtをインストールすると、もしかしたらX11でエラーが発生する可能性あり。
QtCreatorをインストール
Qt Creatorは、クロスプラットフォームのC ++、JavaScript、およびQML統合開発環境であり、GUIアプリケーションの開発を簡素化します。これは、Qt GUIアプリケーション開発フレームワークのSDKの一部であり、ホストOS GUI関数呼び出しをカプセル化するQt APIを使用します。
Wikipediaより
次に必要なパッケージをインストールしていきます。
以下のコマンドを端末を開き、順番に実行しましょう。
sudo apt update
sudo apt install build-essential
sudo apt install qtcreator
sudo apt install qtbase5-examples
sudo apt install qt5-doc
sudo apt install qt5-doc-html
sudo apt install qtbase5-doc-html
sudo apt install qtbase5-dev
sudo apt install -y qt5-qmake qt5-default
上記パッケージをインストールすると、QtCreaterがスタートメニューに表示されます。
LinuxMintの場合:「スタート」→「プログラミング」→「QtCreator」
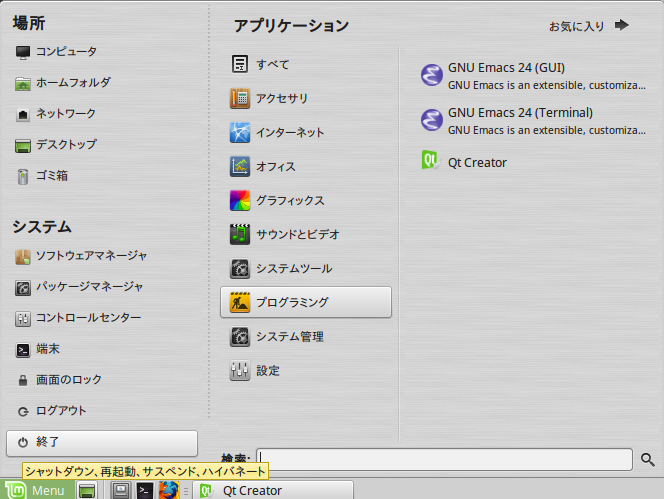
デスクトップにショートカットを作成しておきましょう。

以上でQtCreatorのインストールは完了です。
Hello, World for Qt5
次に、開発環境(IDE)の使い方と、アプリケーション開発の手順をまとめます。
作るものは、超簡単なものです。
プロジェクトの作成
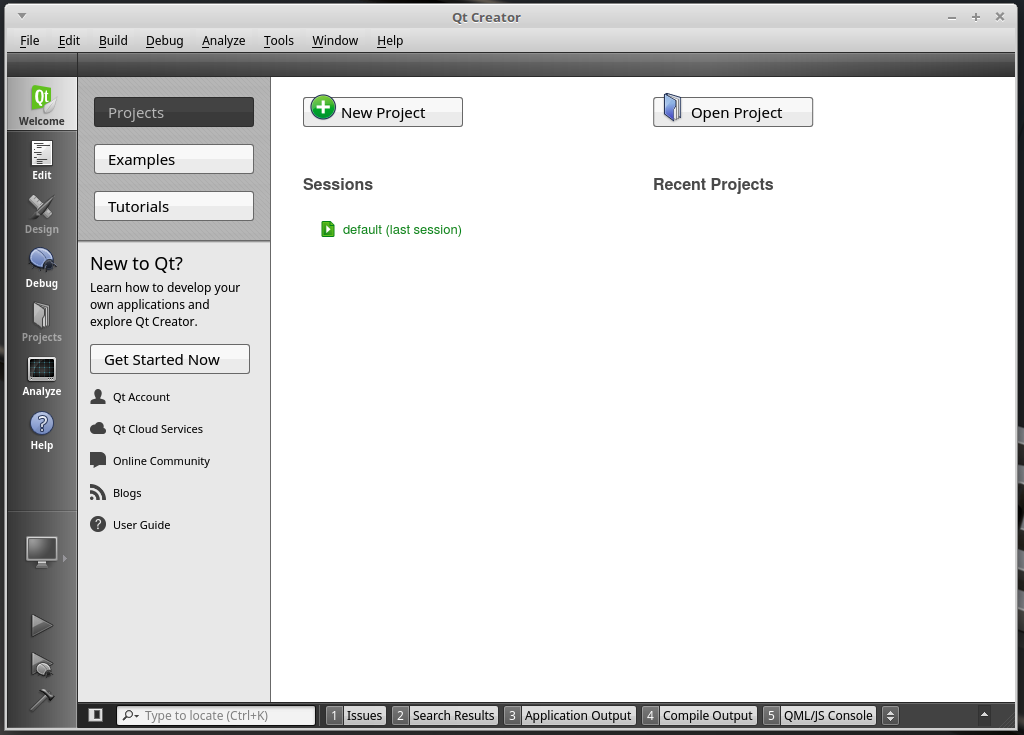
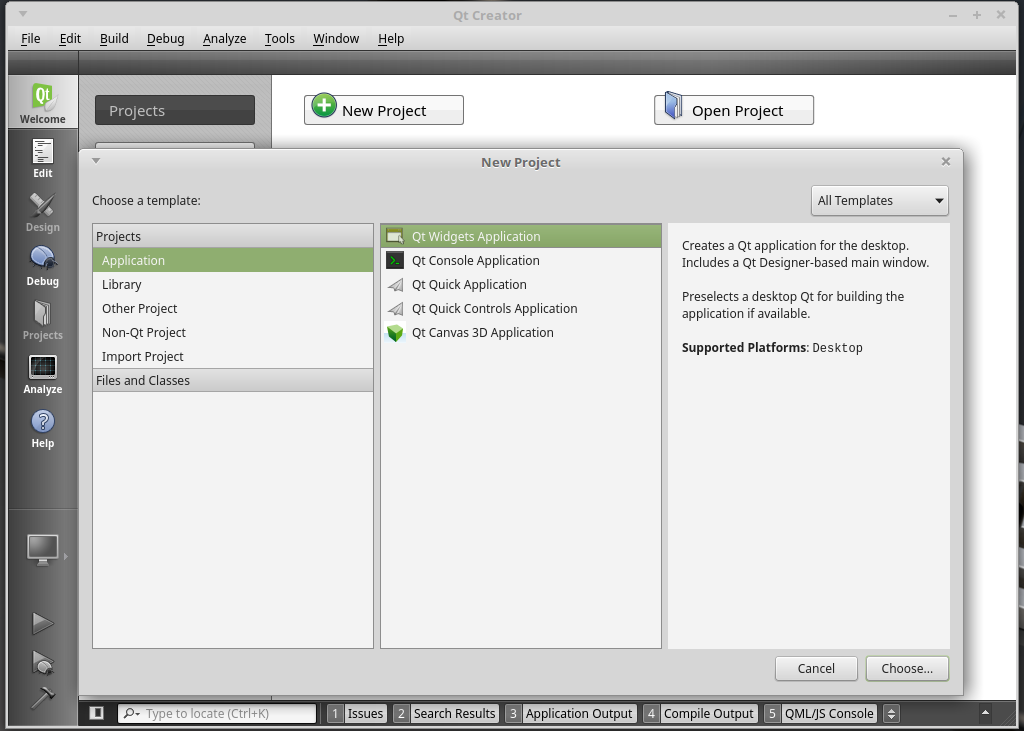
QtCreatorを開くと以下の画面が表示されます。「NewProject」を選択しましょう。
次に、「Application」→「Qt Widgets Application」を選択しましょう。
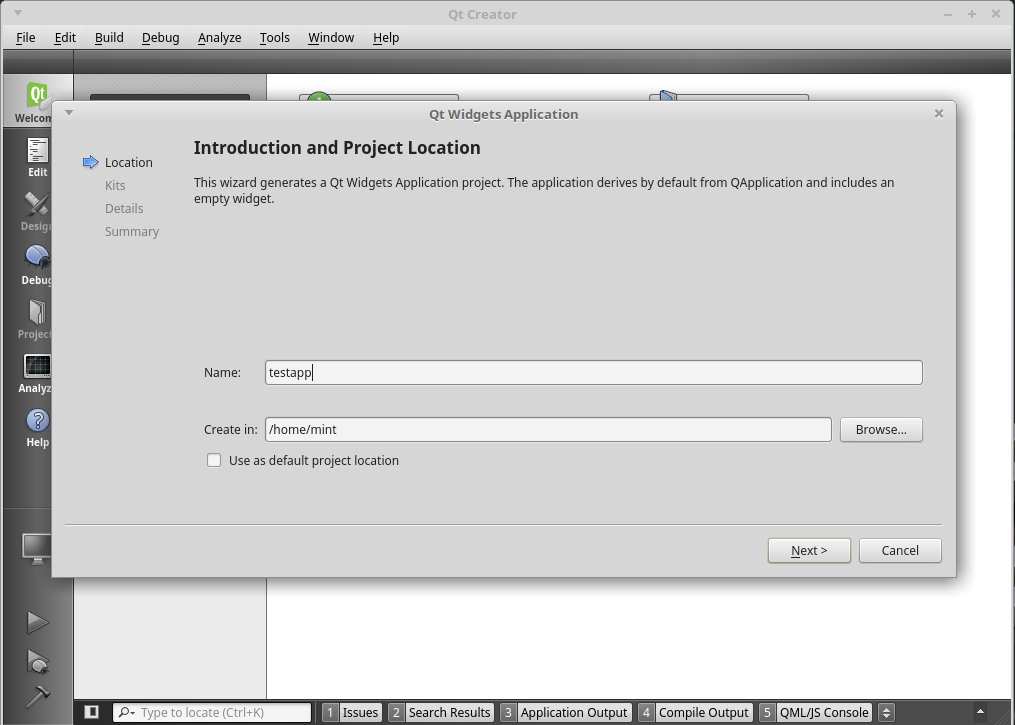
プロジェクトファイルの保存先を指定しましょう。
指定したパスにプロジェクトフォルダが生成されます。変更がなければ、そのままでOKです。
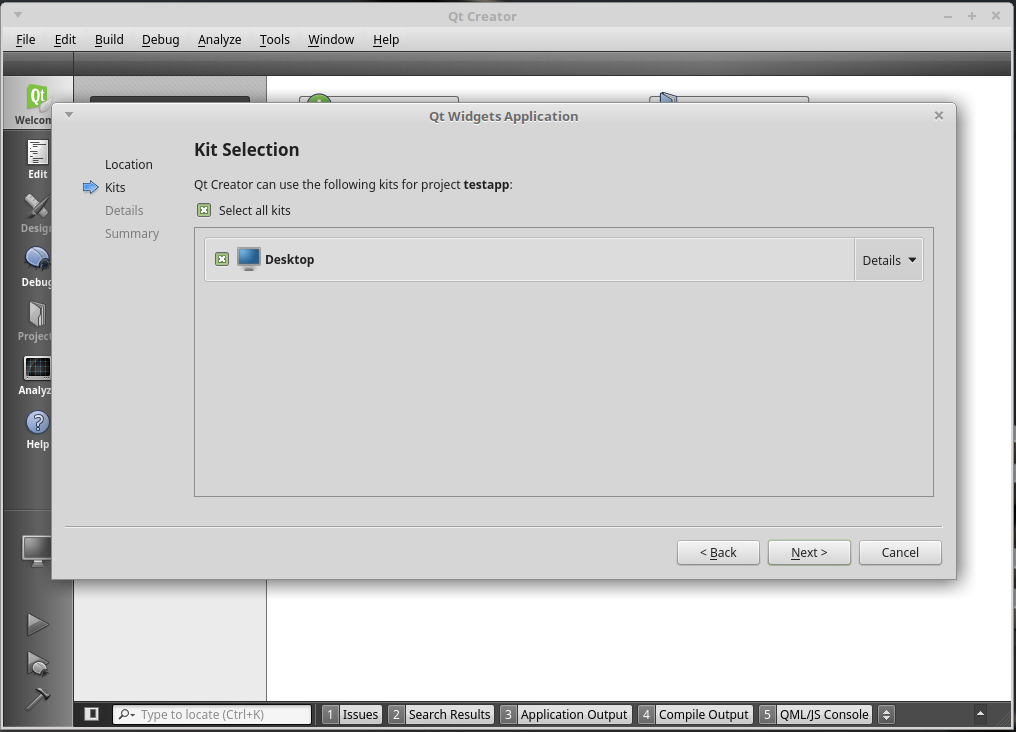
Kit Selectionも変更なければ、このままOKで構いません。
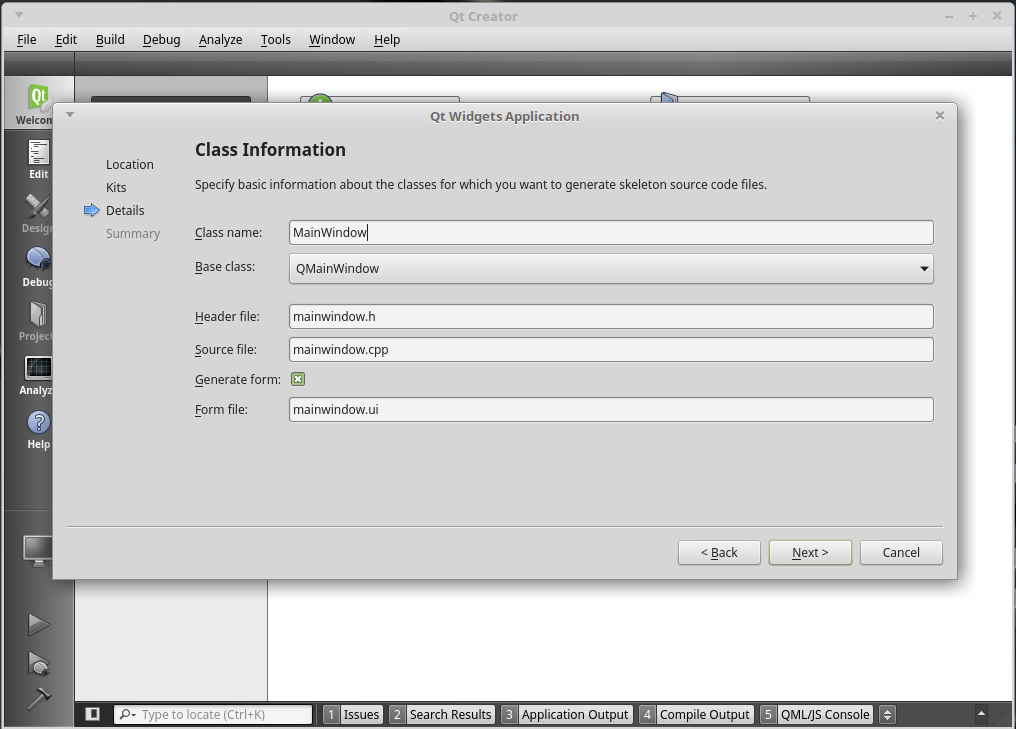
アプリケーションのクラス情報を設定します。
ClassName:基底クラス –> MainWindow
Base class : 基底クラス名 –> QMainWindow
Header file : ヘッダーファイル –> mainwindow.h
Source file : ソースファイル –> mainwindow.cpp
Generator form : フォームを生成する –> check
Form File : フォームファイル –> mainwindow.ui
Add to Version control : NoneでOKです。
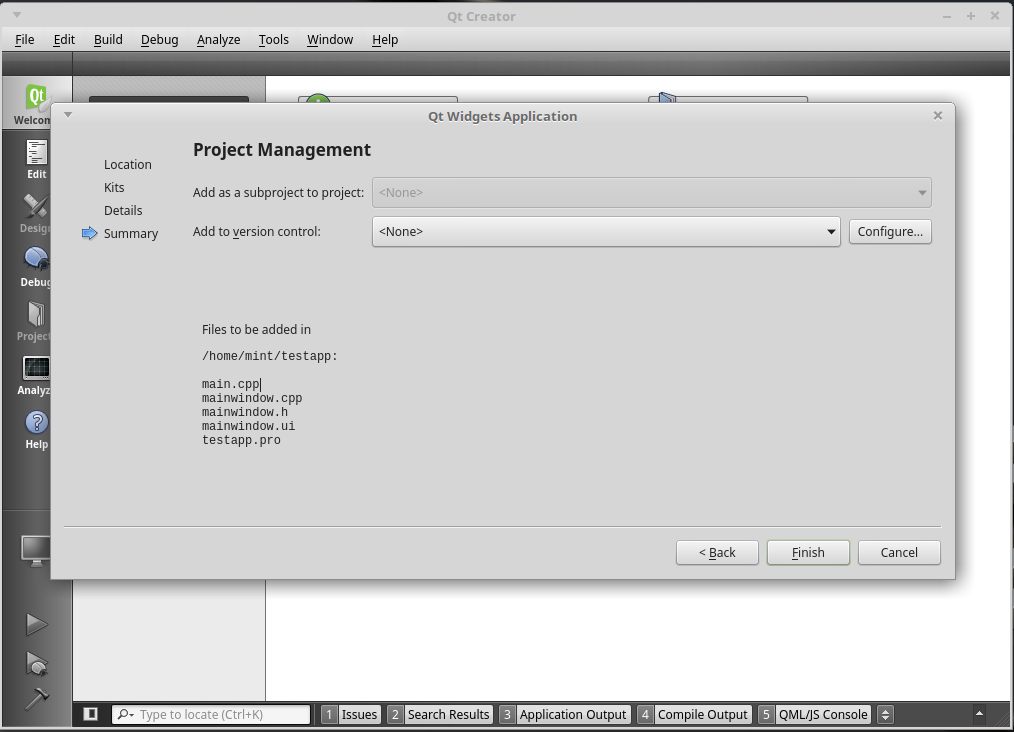
プロジェクトを作成すると、以下の画面が表示されます。
プロジェクトにコードを追加する
今回は、ダイアログにHelloWorldを表示させましょう。
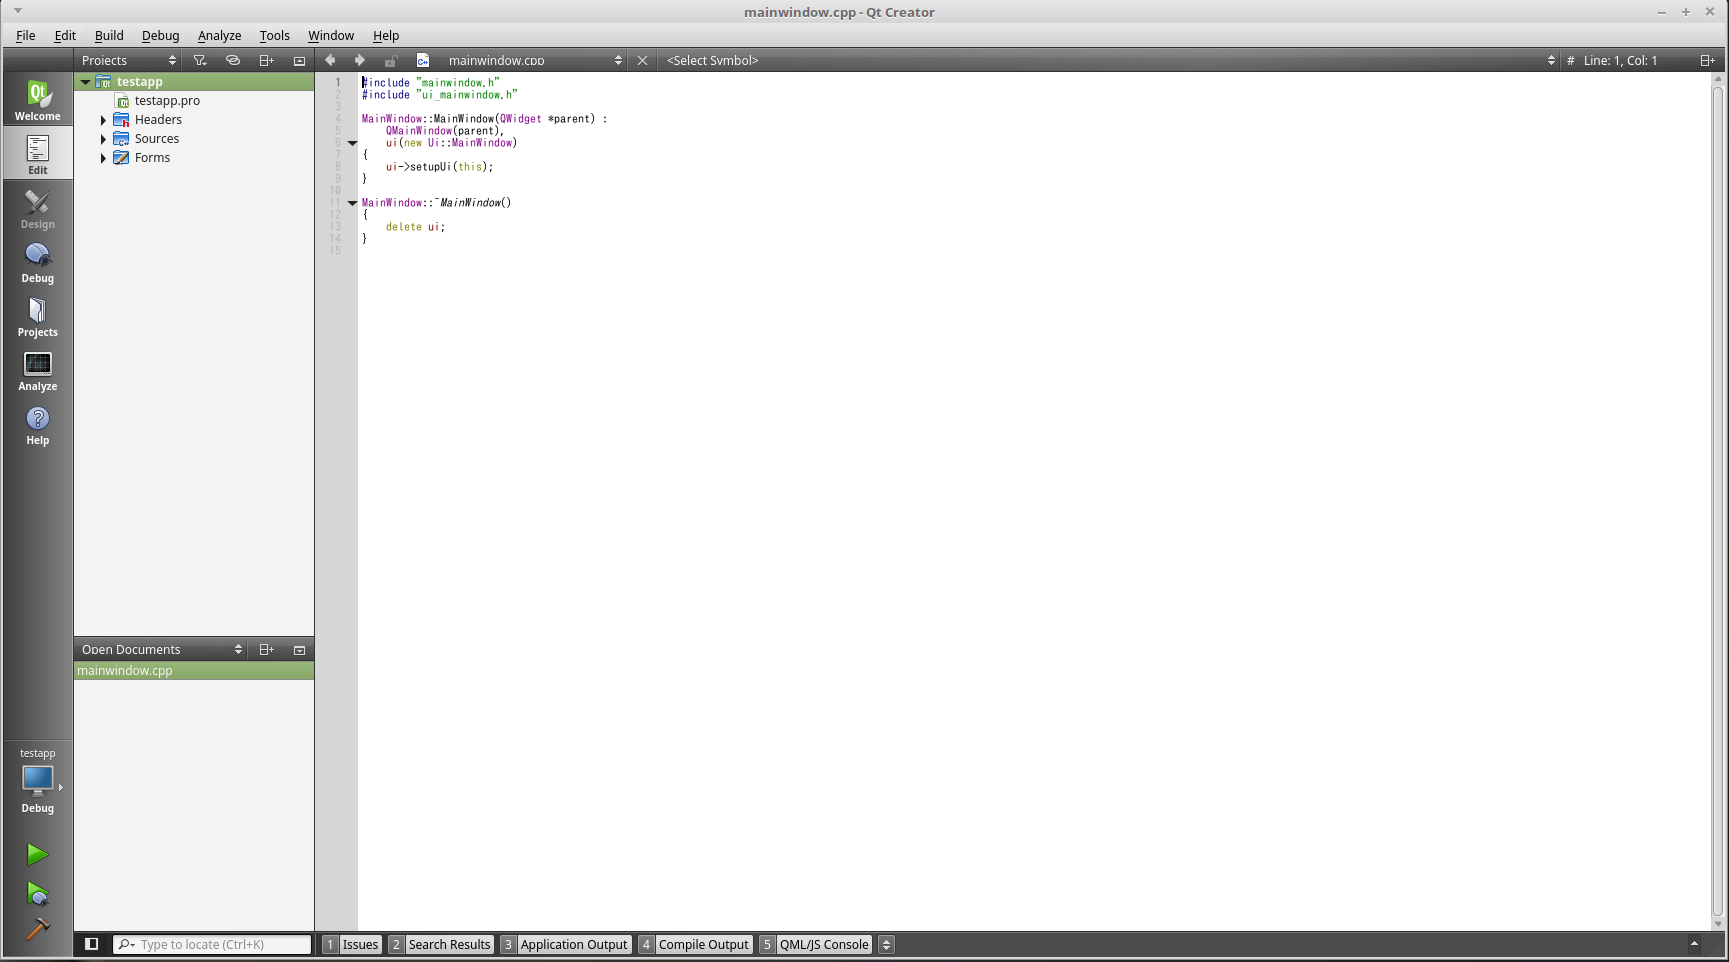
プロジェクトを作成すると、以下の画面のような構成になっていると思います。
今回編集するエディタは、「main.cpp」です。
main.cppは以下のようなコードになっているかと思います。
#include "mainwindow.h"
#include <QApplication>
int main(int argc, char *argv[])
{
QApplication a(argc, argv);
MainWindow w;
w.show();
return a.exec();
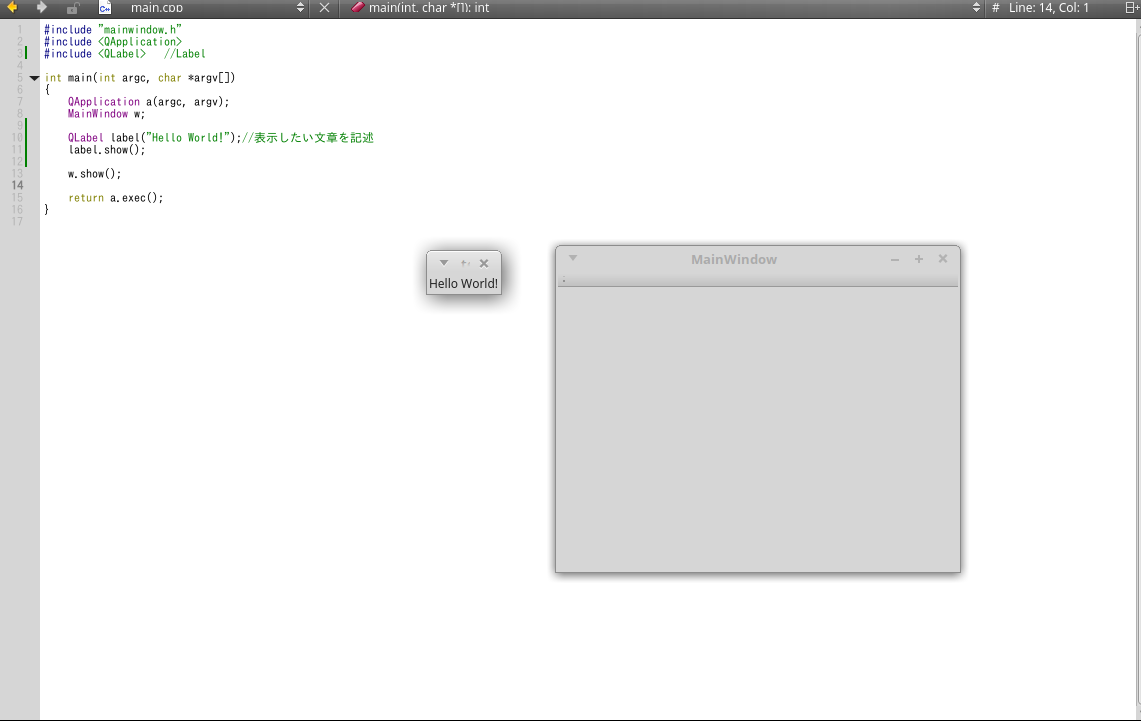
}以下のようにコードを編集しましょう。
#include "mainwindow.h"
#include <QApplication>
#include <QLabel>   //Label

int main(int argc, char *argv[])
{
    QApplication a(argc, argv);
    MainWindow w;
    QLabel* label = new QLabel("Hello World!");
    label.show();
    w.show();
    return a.exec();
}
QLabel
QLabelのクラスを定義します。QLabelはテキストや画像を表示するためのクラス。
QLabel is used for displaying text or an image. No user interaction functionality is provided. The visual appearance of the label can be configured in various ways, and it can be used for specifying a focus mnemonic key for another widget.
QtLabel class
QLabel* label = new QLabel(“Hello World!”);で表示させたいラベルを設定します。
QApplicationオブジェクトは、アプリケーションに関するリソースを管理するためのもので、
argc、argvを渡しているため、Qtでもコマンドライン引数を渡すことができます。
デバッグ
コンパイルする前に、まずデバッグしてみましょう。
左側のタブからDebugを選択すると、画面下側にデバッグ用のウィンドウが表示されます。
下側にある緑の三角ボタンをおし、デバッグを実行します。
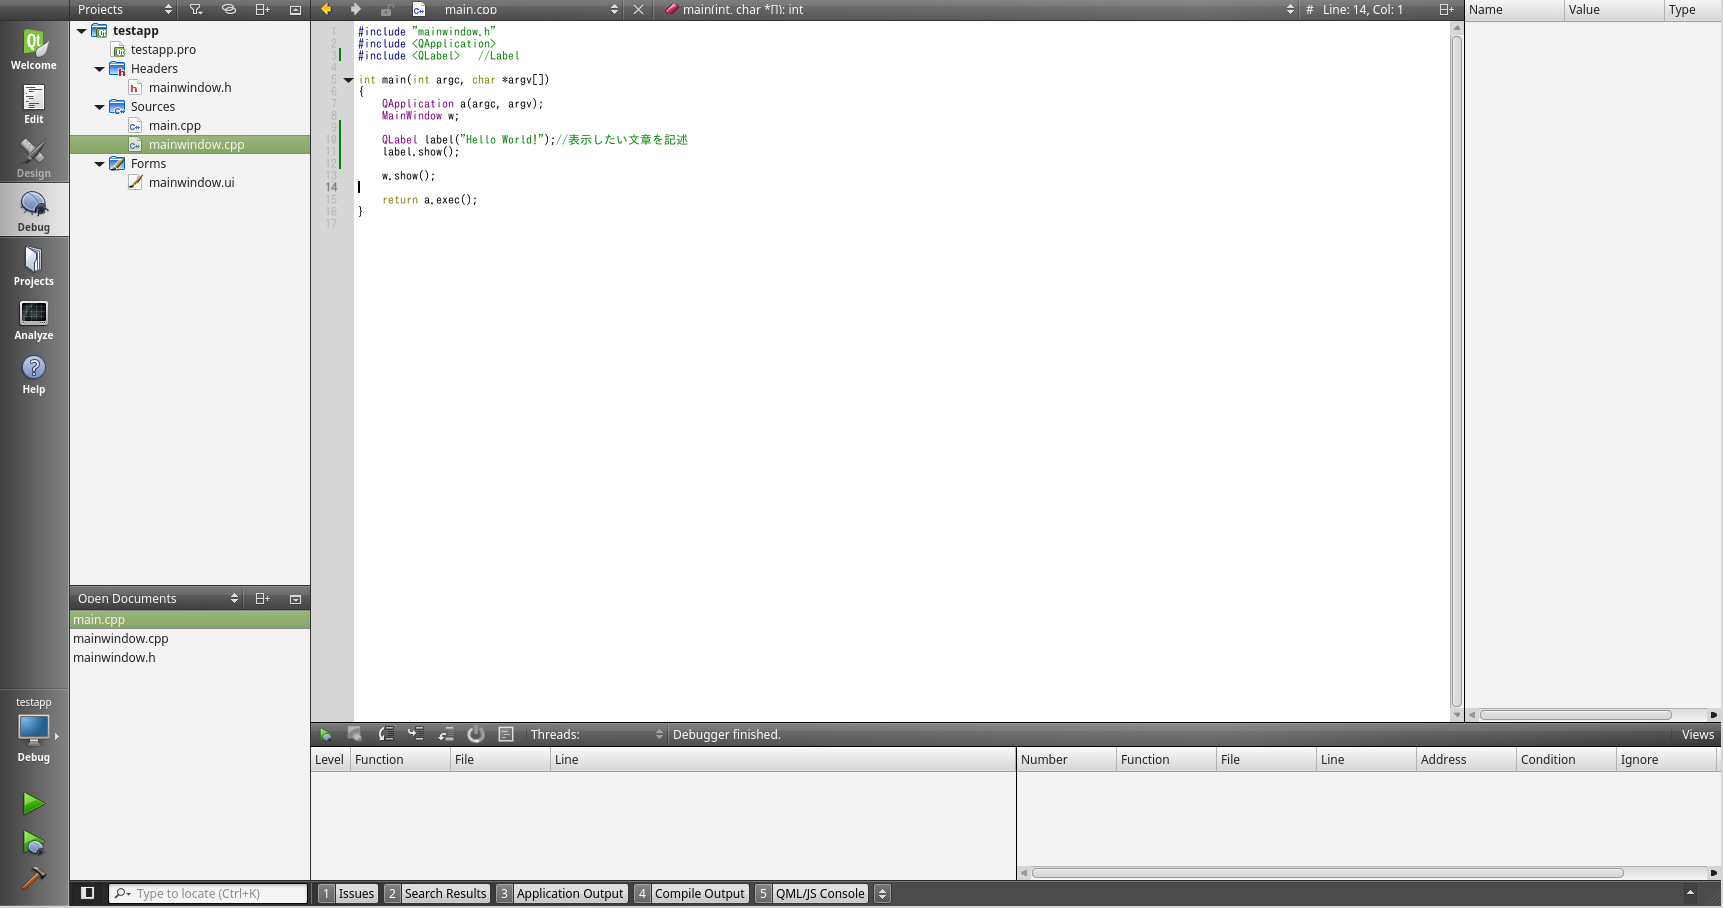
すると、以下の画像のようにウィンドウが表示されると思います。
ウィンドウが2つ出てくると思います。
どうせだったら、MainWindowに「Hello World」を表示させたいですね。
次のようにコードを修正すると、「Hello World」をMainWindowに表示させることができます。
QLabel* label = new QLabel(“Hello World!”, &w);
#include "mainwindow.h"
#include <QApplication>
#include <QLabel>   //Label
int main(int argc, char *argv[])
{
    QApplication a(argc, argv);
    MainWindow w;
    QLabel* label = new QLabel("Hello World!", &w);
    //label.show();
    w.show();
    return a.exec();
}
label.show()は新たにウィンドウを表示させるためのものです。
そのため、QLabelに「&w」の属性をもたせます。
MainWindowのコンストラクタwを属性に指定することで、HelloWorldがMainWindowに表示されます。
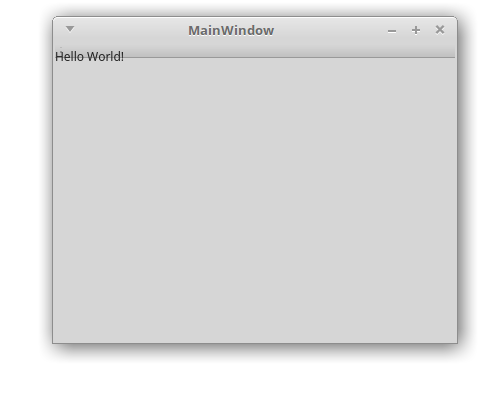
文字がタブにかかっていますが、これはあとで修正しましょう。
次にコンパイルをしましょう。
コンパイル
macOSを使用している人は「ターミナル」、Linuxを使用している人は「端末」、Windowsを使用している人は「コマンドプロンプト」を開きましょう。
macOS : ターミナル
Linux : 端末
Windows:コマンドプロンプト
以下の手順はLinuxで実行した結果になります。
まずプロジェクトが保存されているディレクトリに移動します。
mint@mintmac-VirtualBox ~ $ cd testapp/
mint@mintmac-VirtualBox ~ $ ls -l testapp/
合計 40
-rw-r--r-- 1 mint mint   350  7月 22 23:30 main.cpp
-rw-r--r-- 1 mint mint   219  7月 22 22:58 mainwindow.cpp
-rw-r--r-- 1 mint mint   291  7月 22 22:58 mainwindow.h
-rw-r--r-- 1 mint mint   630  7月 22 22:58 mainwindow.ui
-rw-r--r-- 1 mint mint   360  7月 22 22:58 testapp.pro
-rw-r--r-- 1 mint mint 18517  7月 22 22:58 testapp.pro.user
次にqmakeコマンドを使用して、makeするルールMakefileを作成します。
qmake [プロジェクト名]
mint@mintmac-VirtualBox ~/testapp $ qmake testapp.pro
すると、同じディレクトリにMakefileが作成されると思います。
これでMakeするルールができました。
mint@mintmac-VirtualBox ~/testapp $ ls -l
合計 60
-rw-r--r-- 1 mint mint 16842  7月 22 23:32 Makefile <<-new
-rw-r--r-- 1 mint mint   350  7月 22 23:30 main.cpp
-rw-r--r-- 1 mint mint   219  7月 22 22:58 mainwindow.cpp
-rw-r--r-- 1 mint mint   291  7月 22 22:58 mainwindow.h
-rw-r--r-- 1 mint mint   630  7月 22 22:58 mainwindow.ui
-rw-r--r-- 1 mint mint   360  7月 22 22:58 testapp.pro
-rw-r--r-- 1 mint mint 18517  7月 22 22:58 testapp.pro.user
それでは、makeしてアプリケーションファイルを作成しましょう。
make
mint@mintmac-VirtualBox ~/testapp $ make
/usr/lib/x86_64-linux-gnu/qt5/bin/uic mainwindow.ui -o ui_mainwindow.h
g++ -c -m64 -pipe -O2 -Wall -W -D_REENTRANT -fPIC -DQT_NO_DEBUG -DQT_WIDGETS_LIB -DQT_GUI_LIB -DQT_CORE_LIB -I. -isystem /usr/include/x86_64-linux-gnu/qt5 -isystem /usr/include/x86_64-linux-gnu/qt5/QtWidgets -isystem /usr/include/x86_64-linux-gnu/qt5/QtGui -isystem /usr/include/x86_64-linux-gnu/qt5/QtCore -I. -I. -I/usr/lib/x86_64-linux-gnu/qt5/mkspecs/linux-g++-64 -o main.o main.cpp
g++ -c -m64 -pipe -O2 -Wall -W -D_REENTRANT -fPIC -DQT_NO_DEBUG -DQT_WIDGETS_LIB -DQT_GUI_LIB -DQT_CORE_LIB -I. -isystem /usr/include/x86_64-linux-gnu/qt5 -isystem /usr/include/x86_64-linux-gnu/qt5/QtWidgets -isystem /usr/include/x86_64-linux-gnu/qt5/QtGui -isystem /usr/include/x86_64-linux-gnu/qt5/QtCore -I. -I. -I/usr/lib/x86_64-linux-gnu/qt5/mkspecs/linux-g++-64 -o mainwindow.o mainwindow.cpp
/usr/lib/x86_64-linux-gnu/qt5/bin/moc -DQT_NO_DEBUG -DQT_WIDGETS_LIB -DQT_GUI_LIB -DQT_CORE_LIB -I/usr/lib/x86_64-linux-gnu/qt5/mkspecs/linux-g++-64 -I/home/mint/testapp -I/usr/include/x86_64-linux-gnu/qt5 -I/usr/include/x86_64-linux-gnu/qt5/QtWidgets -I/usr/include/x86_64-linux-gnu/qt5/QtGui -I/usr/include/x86_64-linux-gnu/qt5/QtCore -I/usr/include/c++/5 -I/usr/include/x86_64-linux-gnu/c++/5 -I/usr/include/c++/5/backward -I/usr/lib/gcc/x86_64-linux-gnu/5/include -I/usr/local/include -I/usr/lib/gcc/x86_64-linux-gnu/5/include-fixed -I/usr/include/x86_64-linux-gnu -I/usr/include mainwindow.h -o moc_mainwindow.cpp
g++ -c -m64 -pipe -O2 -Wall -W -D_REENTRANT -fPIC -DQT_NO_DEBUG -DQT_WIDGETS_LIB -DQT_GUI_LIB -DQT_CORE_LIB -I. -isystem /usr/include/x86_64-linux-gnu/qt5 -isystem /usr/include/x86_64-linux-gnu/qt5/QtWidgets -isystem /usr/include/x86_64-linux-gnu/qt5/QtGui -isystem /usr/include/x86_64-linux-gnu/qt5/QtCore -I. -I. -I/usr/lib/x86_64-linux-gnu/qt5/mkspecs/linux-g++-64 -o moc_mainwindow.o moc_mainwindow.cpp
g++ -m64 -Wl,-O1 -o testapp main.o mainwindow.o moc_mainwindow.o   -L/usr/X11R6/lib64 -lQt5Widgets -lQt5Gui -lQt5Core -lGL -lpthread
エラーが発生することなく実行が完了した場合、同じディレクトリにアプリケーションファイルが作成されたかと思います。
mint@mintmac-VirtualBox ~/testapp $ ls -l
合計 124
-rw-r--r-- 1 mint mint 16842  7月 22 23:32 Makefile
-rw-r--r-- 1 mint mint   350  7月 22 23:30 main.cpp
-rw-r--r-- 1 mint mint  4368  7月 22 23:36 main.o
-rw-r--r-- 1 mint mint   219  7月 22 22:58 mainwindow.cpp
-rw-r--r-- 1 mint mint   291  7月 22 22:58 mainwindow.h
-rw-r--r-- 1 mint mint  7600  7月 22 23:36 mainwindow.o
-rw-r--r-- 1 mint mint   630  7月 22 22:58 mainwindow.ui
-rw-r--r-- 1 mint mint  2623  7月 22 23:36 moc_mainwindow.cpp
-rw-r--r-- 1 mint mint  9904  7月 22 23:36 moc_mainwindow.o
-rwxr-xr-x 1 mint mint 27968  7月 22 23:36 testapp         <<-- new
-rw-r--r-- 1 mint mint   360  7月 22 22:58 testapp.pro
-rw-r--r-- 1 mint mint 18517  7月 22 22:58 testapp.pro.user
-rw-r--r-- 1 mint mint  2123  7月 22 23:36 ui_mainwindow.h
これをダブルクリックすると、デバッグした時のようなウィンドウが表示されるはずです。
まとめ
以上が、Qtのインストールからアプリケーション作成の流れになります。
次回は、もう少し役立ちそうなアプリケーションや機能についてまとめていこうと思います。
コメント
[…] 【QtCreatorでアプリ開発】Qt5インストールとQtCreatorを使う ちょっとQtを触る機会があったので、Qtでアプリケーション開発についてまとめます。開発環境は、Linuxをメインで進めていき […]
[…] 前回に引き続きQtCreatorを使って、アプリ開発の触りをまとめました。 […]
DebianでのQTアプリの実行ファイルの作成方法が分からず、いろいろ検索してこちらの記事を見つけました。
おかげさまで実行ファイルを作成することができました。
ありがとうございました。